# Deploying Azure Service Fabric (No Secured)
The ARM template `servicefabricdeploy.json` and its parameter file (`servicefabricdeploy.parameters.json`) are used to create a service fabric cluster environment for windows containers.
## Editing servicefabricdeploy.parameters.json file
Edit the following params in `servicefabricdeploy.parameters.json` file to set your values:
- clusterName: Name of your SF cluster
- dnsName: Name assigned to your SF dns
- adminUserName: user name for administration
- adminPassword: user password for administration
Optionally, you can modify which ports are opened in the LoadBalancer for accessing externally to the apps:
- webMvcHttpPort: port externally exposed for the WebMVC app
- webSpaHttpPort: port externally exposed for the WebSPA app
- webStatusHttpPort: port externally exposed for the WebStatus app
- IdSrvHttpRule: port externally exposed for the Identity app
## Deploy the template
Once parameter file is edited you can deploy it using [create-resources script](../readme.md).
i. e. if you are in windows, to deploy sql databases in a new resourcegroup located in westus, go to `deploy\az` folder and type:
```
create-resources.cmd servicefabric\WindowsContainers\servicefabricdeploy newResourceGroup -c westus
```
## Deploy eShopOnServiceFabric with Visual Studio.
Alternatively, instead of using ARM templates, you can deploy eShop on service fabric directly by publishing the project eShopOnServiceFabric in eShopOnContainers-ServicesAndWebApps.sln with Visual Studio publish tool.
# Deploying Azure Service Fabric (Secured)
The ARM template `servicefabricdeploysecured.json` and its parameter file (`servicefabricdeploysecured.parameters.json`) are used to create a service fabric cluster environment for windows containers secured with a certificate.
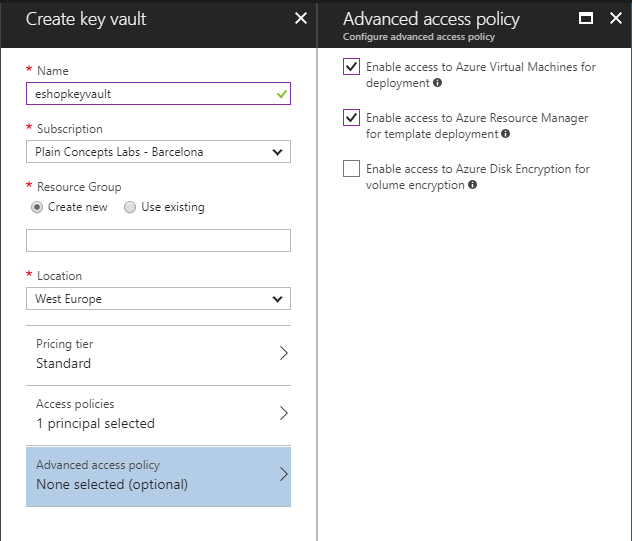
## Create Azure Keyvault service
Go to PortalAzure and create a Keyvault service. Make sure Enable access for deployment checkboxes are selected.
 ## Generate a certificate in Azure Keyvault
Execute the gen-keyvaultcert.ps1 script to generate and download a certificate from Keyvault.
```
.\gen-keyvaultcert.ps1 -vaultName -certName -certPwd -subjectName CN=.westeurope.cloudapp.azure.com -saveDir C:\Users\\Downloads
```
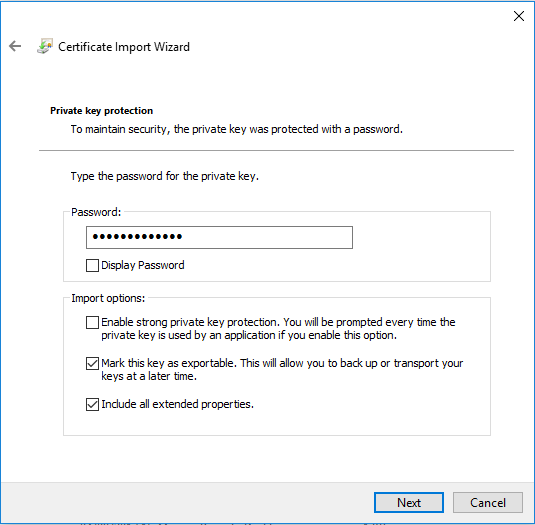
## Install the certificate
Install the certificate under 'Current User' store location and check it as exportable.
## Generate a certificate in Azure Keyvault
Execute the gen-keyvaultcert.ps1 script to generate and download a certificate from Keyvault.
```
.\gen-keyvaultcert.ps1 -vaultName -certName -certPwd -subjectName CN=.westeurope.cloudapp.azure.com -saveDir C:\Users\\Downloads
```
## Install the certificate
Install the certificate under 'Current User' store location and check it as exportable.
 ## Editing servicefabricdeploysecured.parameters.json file
Edit the following params in `servicefabricdeploysecured.parameters.json` file to set your values:
- clusterName: Name of your SF cluster
- dnsName: Name assigned to your SF dns
- adminUserName: user name for administration
- adminPassword: user password for administration
- sourceVaultValue: keyvault resource id (check azure keyvault properties)
- certificateUrlValue: certificate url (check azure Keyvault certificate properties)
- certificateThumbprint: certificate thumbprint (check azure Keyvault certificate properties)
Optionally, you can modify which ports are opened in the LoadBalancer for accessing externally to the apps:
- webMvcHttpPort: port externally exposed for the WebMVC app
- webSpaHttpPort: port externally exposed for the WebSPA app
- webStatusHttpPort: port externally exposed for the WebStatus app
- IdSrvHttpRule: port externally exposed for the Identity app
## Deploy the template
Once parameter file is edited you can deploy it using [create-resources script](../readme.md).
```
create-resources.cmd servicefabric\WindowsContainers\servicefabricdeploysecured newResourceGroup -c westus
```
## Deploy eShopOnServiceFabric with Visual Studio.
Modify the cloud.xml file of each Service Fabric application in PublishProfile directory and set your certificate settings to be able to deploy eshopOnContainers in the secured cluster:
## Editing servicefabricdeploysecured.parameters.json file
Edit the following params in `servicefabricdeploysecured.parameters.json` file to set your values:
- clusterName: Name of your SF cluster
- dnsName: Name assigned to your SF dns
- adminUserName: user name for administration
- adminPassword: user password for administration
- sourceVaultValue: keyvault resource id (check azure keyvault properties)
- certificateUrlValue: certificate url (check azure Keyvault certificate properties)
- certificateThumbprint: certificate thumbprint (check azure Keyvault certificate properties)
Optionally, you can modify which ports are opened in the LoadBalancer for accessing externally to the apps:
- webMvcHttpPort: port externally exposed for the WebMVC app
- webSpaHttpPort: port externally exposed for the WebSPA app
- webStatusHttpPort: port externally exposed for the WebStatus app
- IdSrvHttpRule: port externally exposed for the Identity app
## Deploy the template
Once parameter file is edited you can deploy it using [create-resources script](../readme.md).
```
create-resources.cmd servicefabric\WindowsContainers\servicefabricdeploysecured newResourceGroup -c westus
```
## Deploy eShopOnServiceFabric with Visual Studio.
Modify the cloud.xml file of each Service Fabric application in PublishProfile directory and set your certificate settings to be able to deploy eshopOnContainers in the secured cluster:
