Deploying a Service Fabric cluster based on Linux nodes
A. Unsecured cluster (SF Linux cluster)
For a secured cluster, see option B. below.
You can always deploy a SF cluster through the Azure portal, as explained in this article: https://docs.microsoft.com/en-us/azure/service-fabric/service-fabric-get-started-azure-cluster
However, when creating a cluster, there are quite a few configurations to take into account, like enabling the internal DNS service or Reverse Proxy service, choosing between Linux/Windows, open/publish your application ports in the load-balancer and most of all (the most complex setup) how to create a secure cluster.
Because of those reasons, we have created a set of ARM templates and scripts so you can create, re-create and configure the SF clusters much faster, as explained below:
Within eShopOnContainers root folder, at the folder ..\deploy\az\servicefabric\LinuxContainers, you can find the ARM template servicefabricdeploy.json and its parameters file (servicefabricdeploy.parameters.json) to create a Service Fabric cluster environment for Linux Containers.
Edit the servicefabricdeploy.parameters.json file
Edit the following params in servicefabricdeploy.parameters.json file to set your values:
- clusterName: Name of your SF cluster
- clusterLocation: Datacenter location, like westus or westeurope
- computeLocation: Datacenter location, like westus or westeurope
- adminUserName: user-name for VMs administration
- adminPassword: user-password for VMs administration
- dnsName: Name assigned to your SF dns
Optionally, you could modify which ports are opened in the LoadBalancer for the multiple eShopOnContainer apps and API services. By default, they are setup as:
- webMvcHttpPort: 5100
- webSpaHttpPort: 5104
- webStatusHttpPort: 5107
- IdSrvHttpRule: 5105
- BasketApiHttpRule: 5103
- CatalogApiHttpRule: 5101
- OrderingApiHttpRule: 5102
- MarketingApiHttpRule: 5110
- LocationsApiHttpRule: 5109
Deploy the Service Fabric cluster using the script and ARM templates
Once parameter file is edited you can deploy it using create-resources script.
For example, to deploy the cluster to a new resourcegroup located in westus, go to deploy\az folder and type:
create-resources.cmd servicefabric\LinuxContainers\servicefabricdeploy qa-eshop-sflinux-resgrp -c westus
You should see a similar execution to the following:

Now, if you go to your subscription in Azure, you should be able to see the SF cluster already created and available, like in the following image:
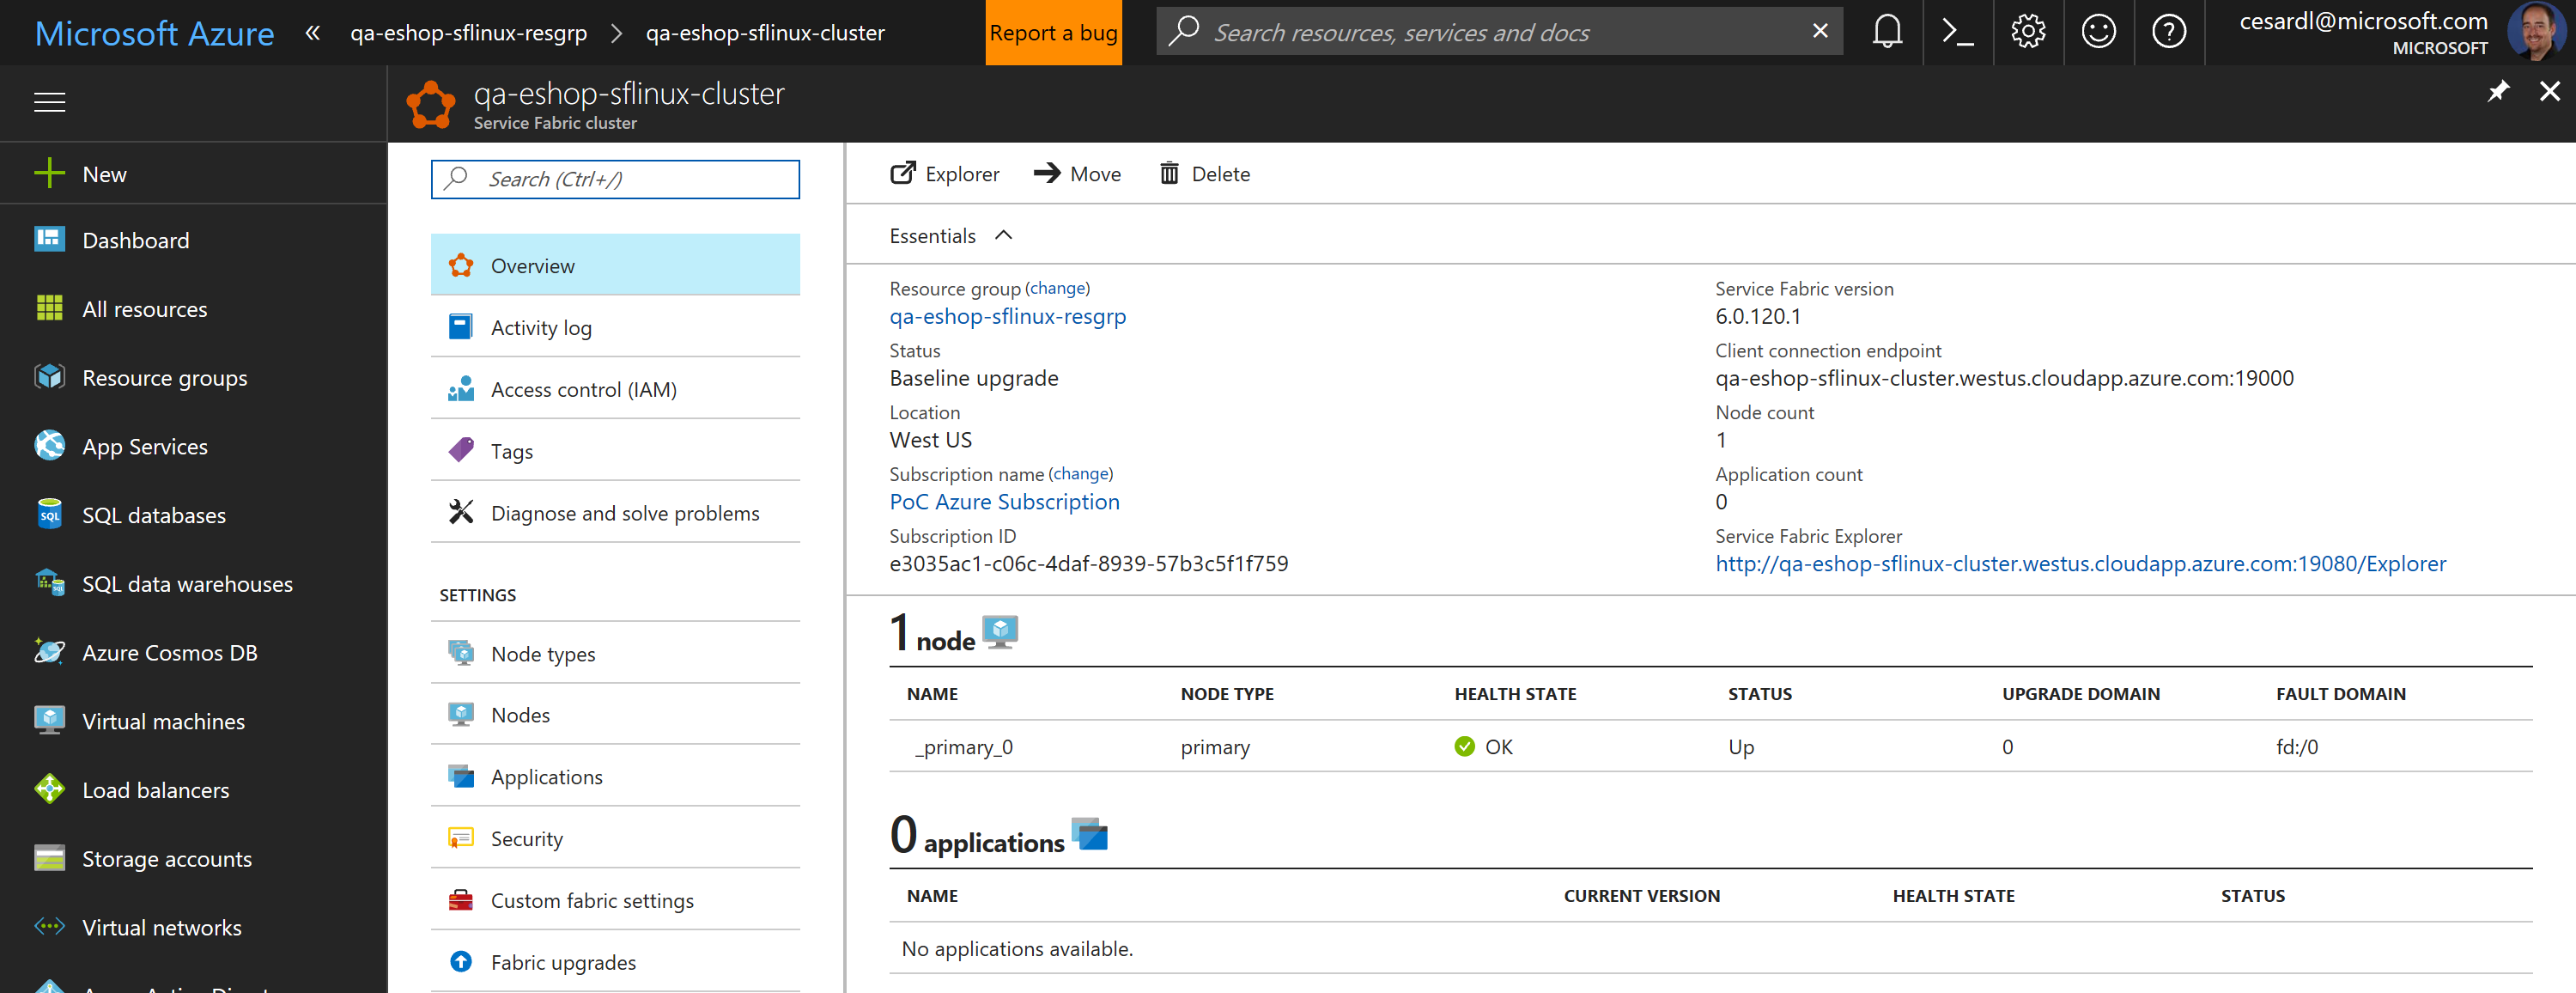
In this case, this is an unsecured SF cluster with a single Linux node, good for initial tests and getting started with SF.
B. Secured cluster (SF Linux cluster)
Within eShopOnContainers root folder, at the folder ..\deploy\az\servicefabric\LinuxContainers, you can find the ARM template servicefabricdeploysecured.json and its parameter file (servicefabricdeploysecured.parameters.json) to create a secured Service Fabric cluster environment for Linux Containers (IN THIS CASE, IT IS A SECURED CLUSTER USING A CERTIFICATE).
The ARM template servicefabricdeploysecured.json and its parameter file (servicefabricdeploysecured.parameters.json) are used to create a service fabric cluster environment for linux containers secured with a certificate.
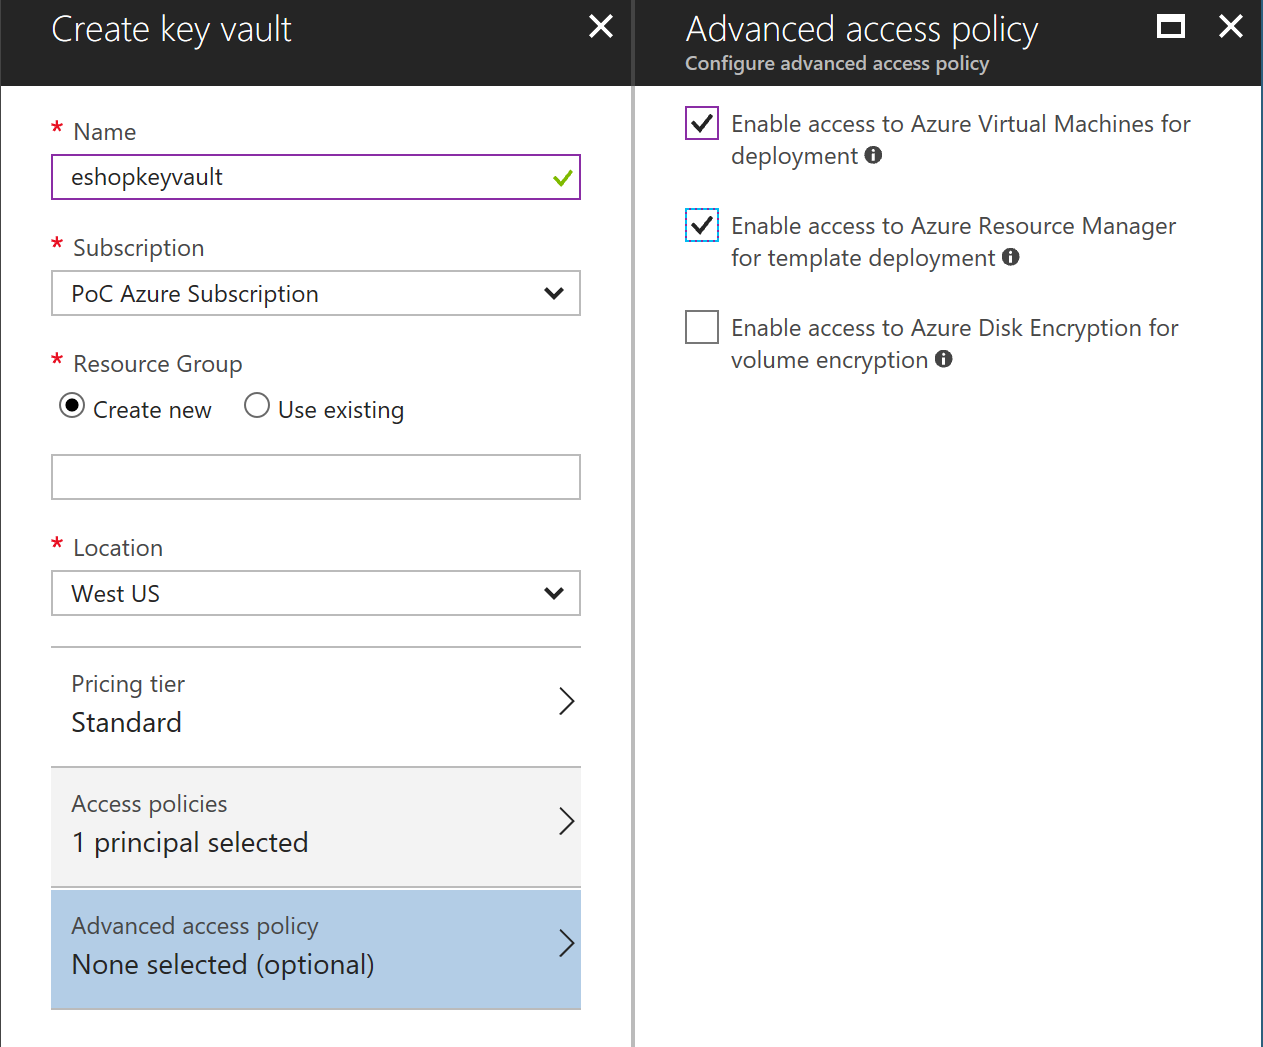
Create Azure Keyvault service
Go to PortalAzure and create a Keyvault service. Make sure Enable access for deployment checkboxes are selected.
Generate a certificate in Azure Keyvault
In a POWER-SHELL window, move to the folder ..\deploy\az\servicefabric\LinuxContainers.
Select your Azure subscription You might have several Azure subscriptions as shown if you type the following.
>```
>az account list
>```
If you have multiple subscription accounts, you first need to select the Azure subscription account you want to target. Type the following:
>```
>az account set --subscription "Your Azure Subscription Name or ID"
>```
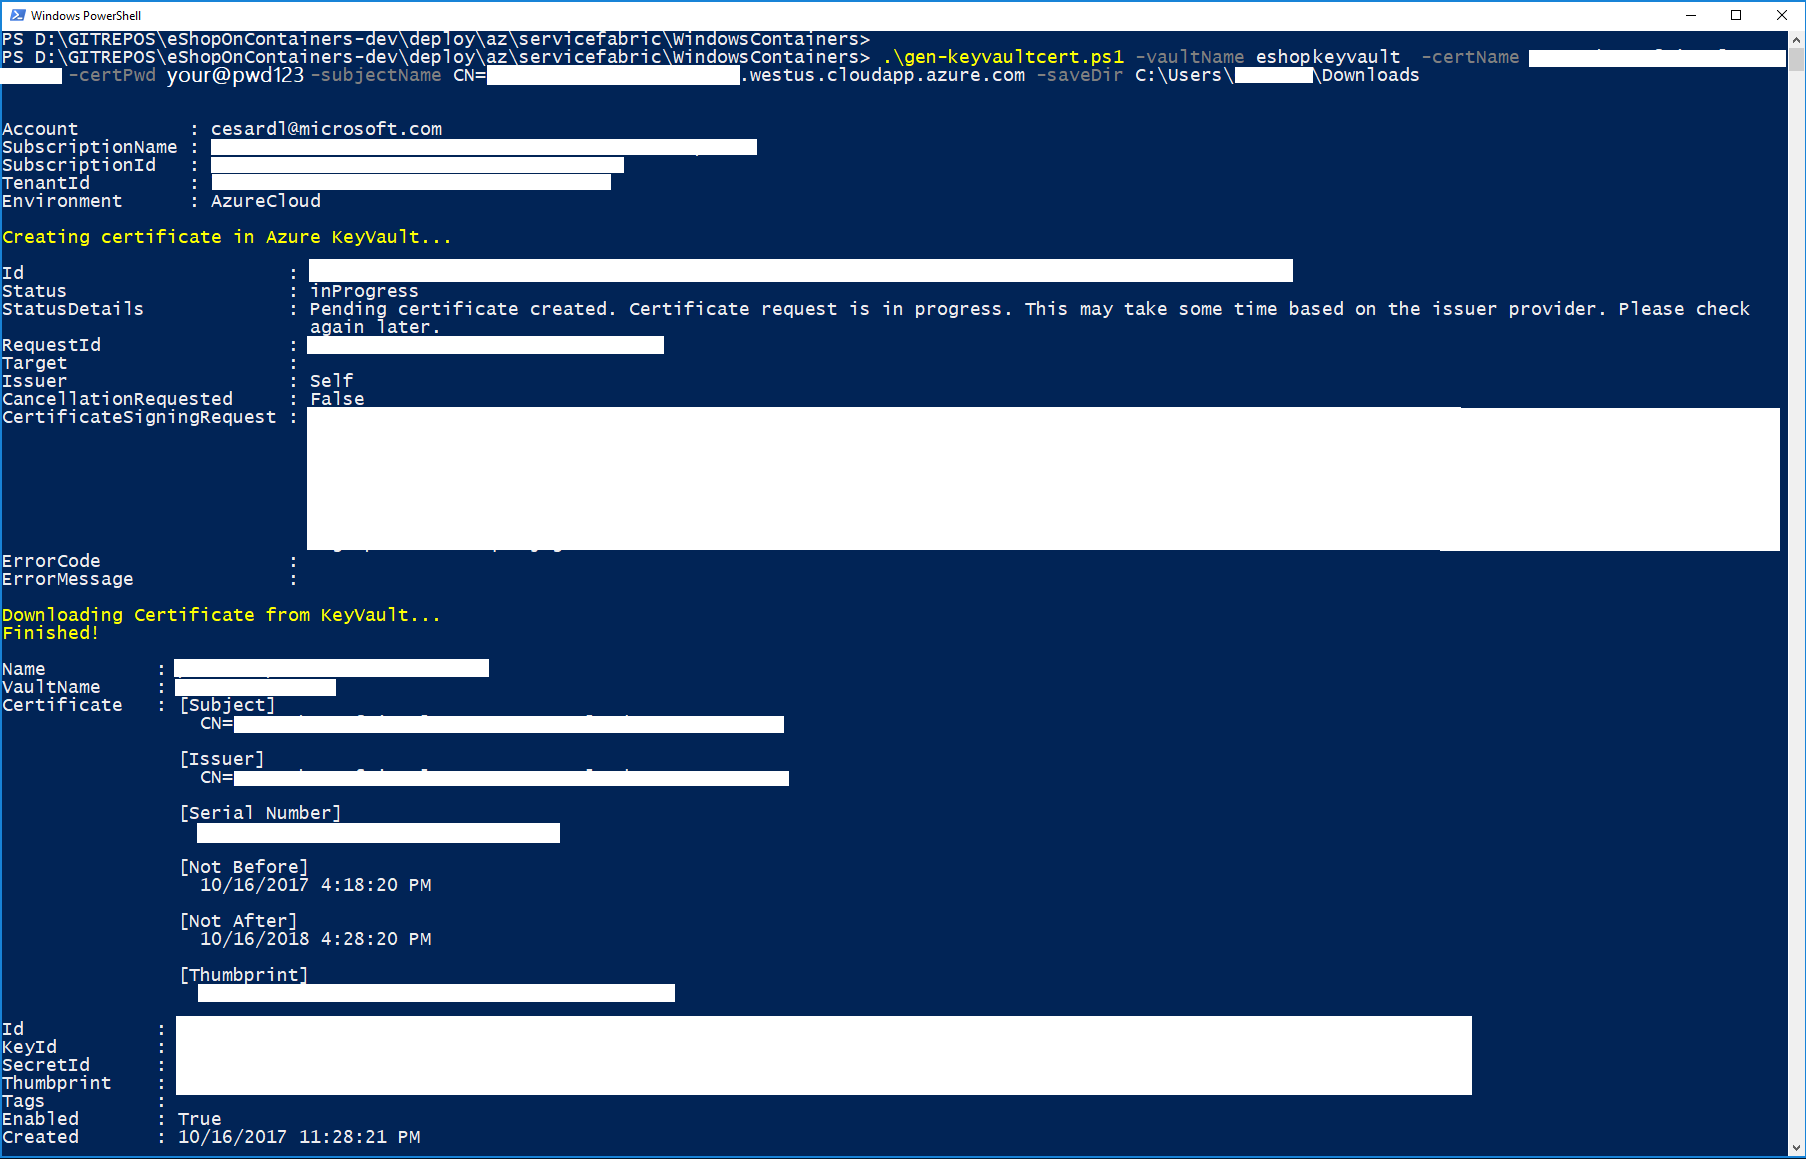
Execute the gen-keyvaultcert.ps1 script to generate and download a certificate from Keyvault.
.\gen-keyvaultcert.ps1 -vaultName <your_keyvault_service> -certName <your_cert_name> -certPwd <your_cert_pwd> -subjectName CN=<your_sf_dns_name>.westeurope.cloudapp.azure.com -saveDir C:\Users\<user>\Downloads
You should see a similar execution to the following:
IMPORTANT: At this point, copy/cut the .PFX certifiacte file saved in the downloads forlder and save it in a secure place.
Install the certificate
Install the certificate (by double-clicking on the .PFX file) under 'Current User' store location (by default location) and check it as exportable.

Editing servicefabricdeploysecured.parameters.json file
Edit the following params in servicefabricdeploysecured.parameters.json file to set your values:
- clusterName: Name of your SF cluster
- dnsName: Name assigned to your SF dns
- adminUserName: user name for administration
- adminPassword: user password for administration
- sourceVaultValue: keyvault resource id (check azure keyvault properties)
- certificateUrlValue: certificate url (check azure Keyvault certificate properties)
- certificateThumbprint: certificate thumbprint (check azure Keyvault certificate properties)
Optionally, you can modify which ports are opened in the LoadBalancer for accessing externally to the apps:
- webMvcHttpPort: port externally exposed for the WebMVC app
- webSpaHttpPort: port externally exposed for the WebSPA app
- webStatusHttpPort: port externally exposed for the WebStatus app
- IdSrvHttpRule: port externally exposed for the Identity app
Deploy the template
Once parameter file is edited you can deploy it using create-resources script.
create-resources.cmd servicefabric\LinuxContainers\servicefabricdeploysecured newResourceGroup -c westus
Deploy eShopOnServiceFabric with Visual Studio.
Modify the cloud.xml file of each Service Fabric application in PublishProfile directory and set your certificate settings to be able to deploy eshopOnContainers in the secured cluster:
