|
|
- # Deploying a Service Fabric cluster based on Windows nodes
-
- ## A. Unsecured cluster (SF Windows cluster)
- For a secured cluster, see option B. below.
-
- You can always deploy a SF cluster through the Azure portal, as explained in this article: https://docs.microsoft.com/en-us/azure/service-fabric/service-fabric-get-started-azure-cluster
-
- However, when creating a cluster, there are quite a few configurations to take into account, like enabling the internal DNS service or Reverse Proxy service, choosing between Linux/Windows, open/publish your application ports in the load-balancer and most of all (the most complex setup) how to create a secure cluster.
-
- Because of those reasons, we have created a set of ARM templates and scripts so you can create, re-create and configure the SF clusters much faster, as explained below:
-
- Within eShopOnContainers root folder, at the folder [..\deploy\az\servicefabric\WindowsContainers](https://github.com/dotnet-architecture/eShopOnContainers/tree/dev/deploy/az/servicefabric/WindowsContainers), you can find the ARM template `servicefabricdeploy.json` and its parameters file (`servicefabricdeploy.parameters.json`) to create a Service Fabric cluster environment for Windows Containers (NOT SECURED CLUSTER).
-
- ## Edit the servicefabricdeploy.parameters.json file
-
- Edit the following params in `servicefabricdeploy.parameters.json` file to set your values:
-
- - clusterName: Name of your SF cluster
- - clusterLocation: Datacenter location, like westus or westeurope
- - computeLocation: Datacenter location, like westus or westeurope
- - adminUserName: user-name for VMs administration
- - adminPassword: user-password for VMs administration
- - dnsName: Name assigned to your SF dns
-
- Optionally, you could modify which ports are opened in the LoadBalancer for the multiple eShopOnContainer apps and API services.
- By default, they are setup as:
- - webMvcHttpPort: 5100
- - webSpaHttpPort: 5104
- - webStatusHttpPort: 5107
- - IdSrvHttpRule: 5105
- - BasketApiHttpRule: 5103
- - CatalogApiHttpRule: 5101
- - OrderingApiHttpRule: 5102
- - MarketingApiHttpRule: 5110
- - LocationsApiHttpRule: 5109
-
- ## Deploy the Service Fabric cluster using the script and ARM templates
-
- Once parameter file is edited you can deploy it using [create-resources script](../readme.md).
-
- For example, to deploy the cluster to a new resourcegroup located in westus, using the Command Prompt, go to `deploy\az` folder and type:
- ```
- create-resources.cmd servicefabric\WindowsContainers\servicefabricdeploy qa-eshop-sfwin-resgrp -c westus
- ```
-
- You should see a similar execution to the following:
- 
-
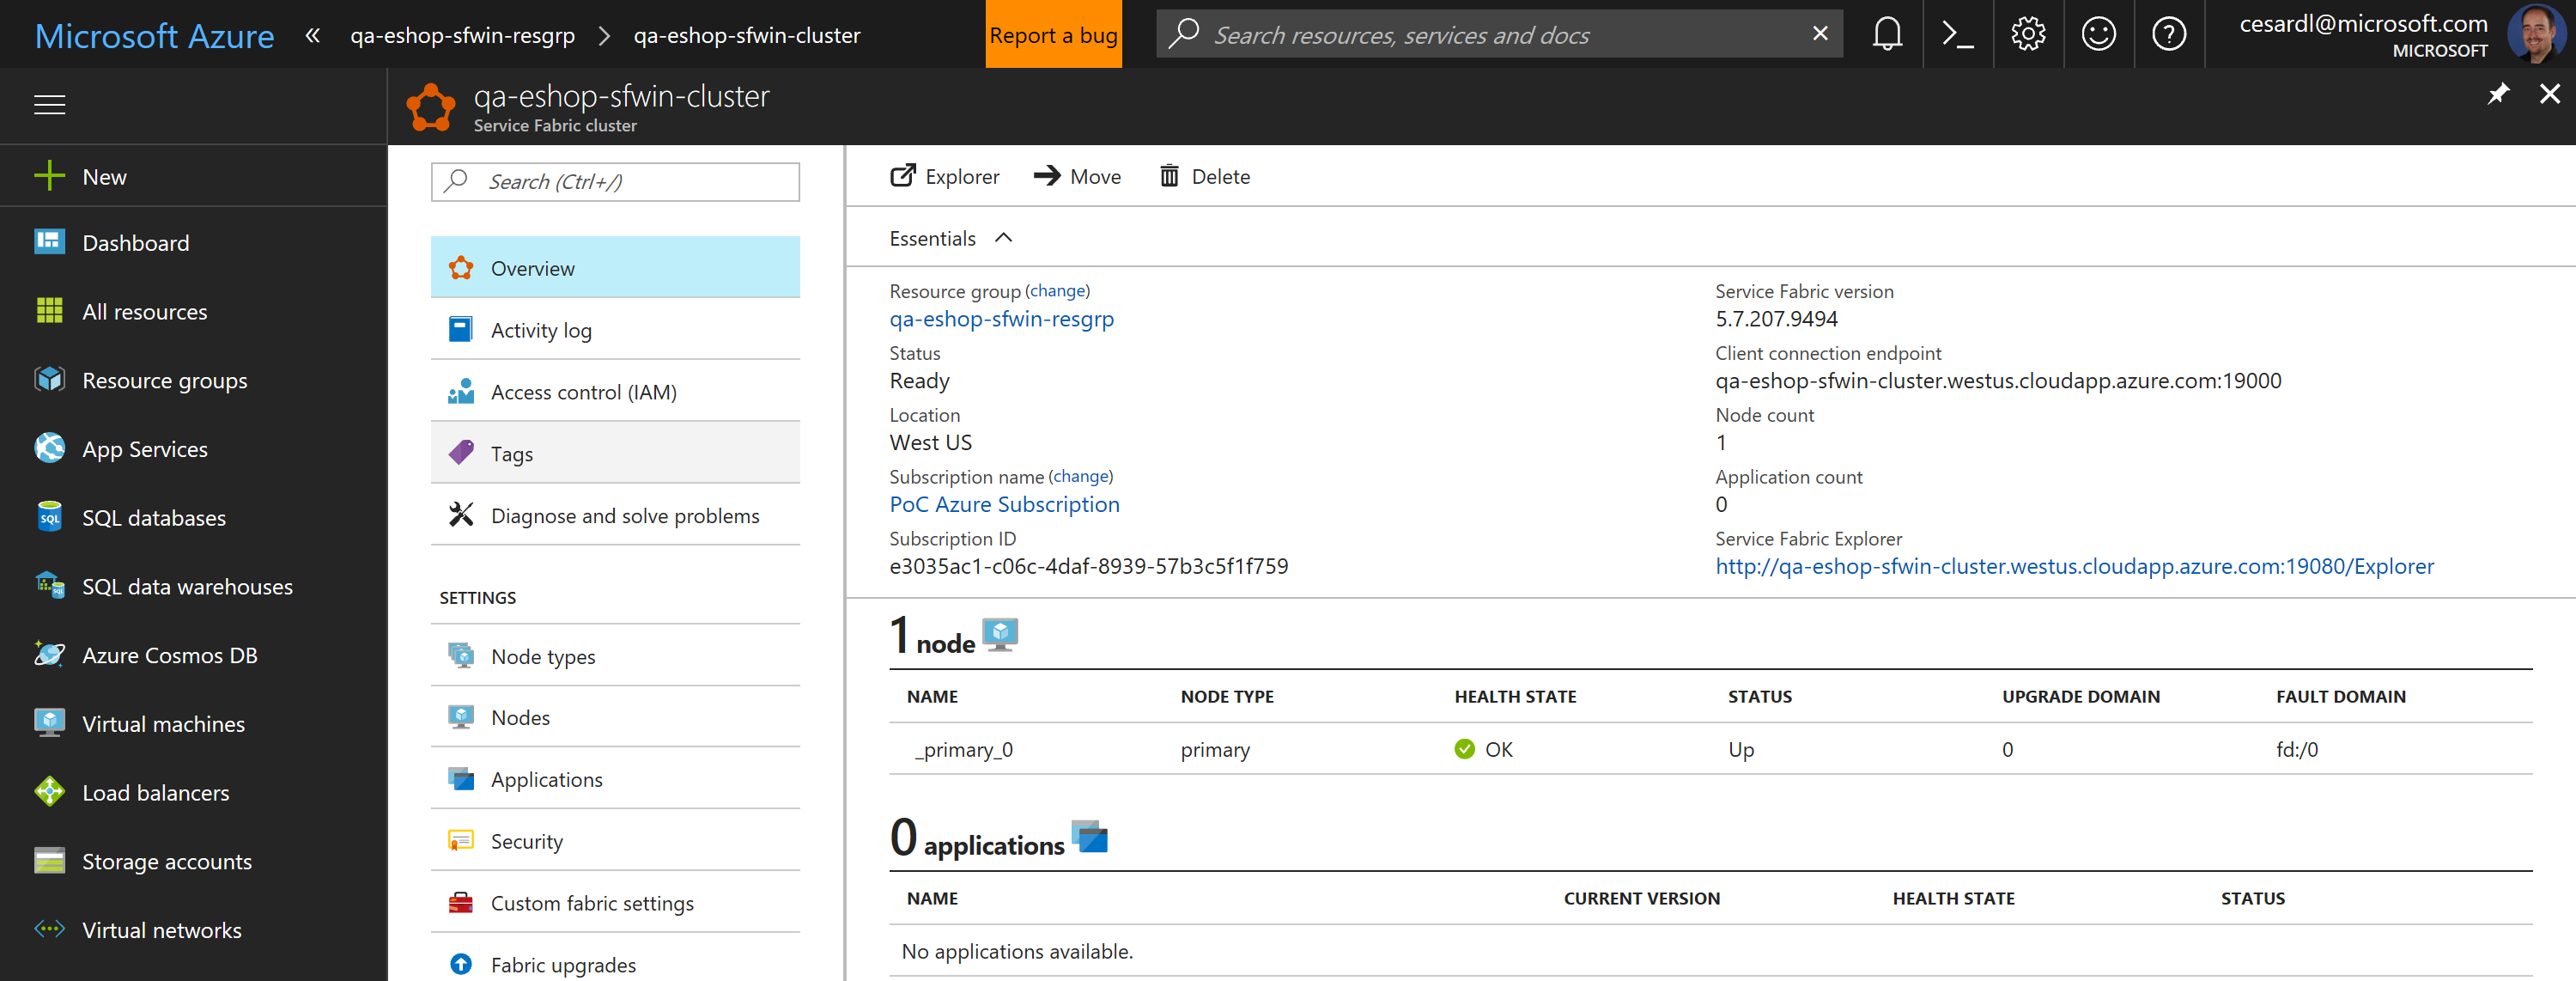
- Now, if you go to your subscription in Azure, you should be able to see the SF cluster already created and available, like in the following image:
-
- 
-
- In this case, this is an unsecured SF cluster with a single Windows node, good for initial tests and getting started with SF.
-
-
- ## B. Secured cluster (SF Windows cluster)
-
- Within eShopOnContainers root folder, at the folder [..\deploy\az\servicefabric\WindowsContainers](https://github.com/dotnet-architecture/eShopOnContainers/tree/dev/deploy/az/servicefabric/WindowsContainers), you can find the ARM template `servicefabricdeploysecured.json` and its parameter file (`servicefabricdeploysecured.parameters.json`) to create a secured Service Fabric cluster environment for Windows Containers (IN THIS CASE, IT IS A SECURED CLUSTER USING A CERTIFICATE).
-
- ## Create Azure Keyvault service
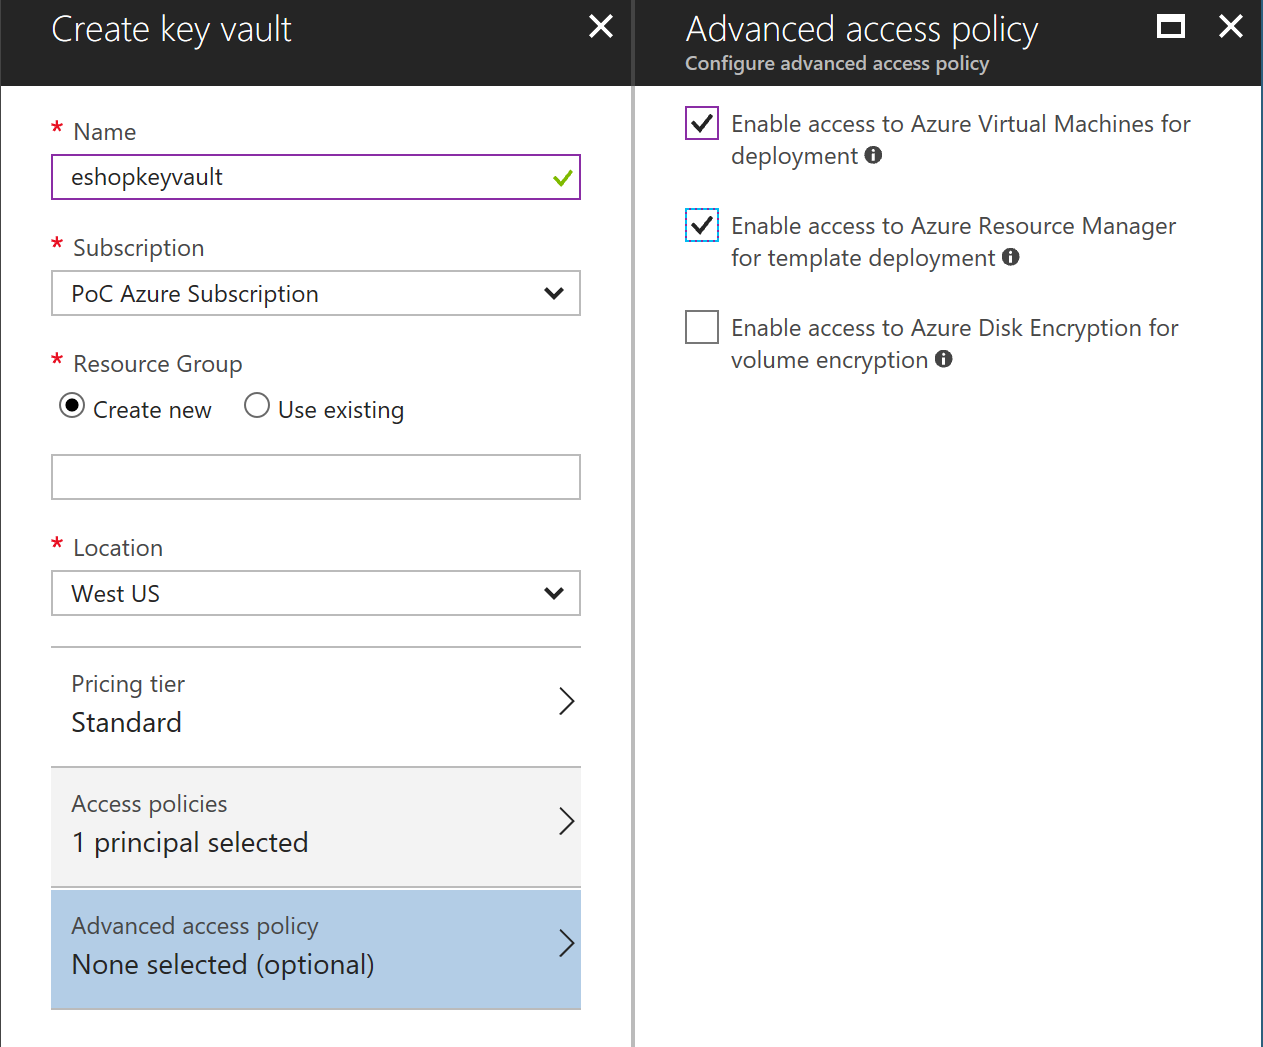
- Go to PortalAzure and create a Keyvault service. Make sure Enable access for deployment checkboxes are selected.
-
- 
-
- ## Generate a certificate in Azure Keyvault
- In a POWER-SHELL window, move to the folder [..\deploy\az\servicefabric\WindowsContainers](https://github.com/dotnet-architecture/eShopOnContainers/tree/dev/deploy/az/servicefabric/WindowsContainers).
-
- **Select your Azure subscription** You might have [several Azure subscriptions](https://docs.microsoft.com/en-us/cli/azure/account#set) as shown if you type the following.
-
- >```
- >az account list
- >```
- If you have multiple subscription accounts, you first need to select the Azure subscription account you want to target. Type the following:
- >```
- >az account set --subscription "Your Azure Subscription Name or ID"
- >```
-
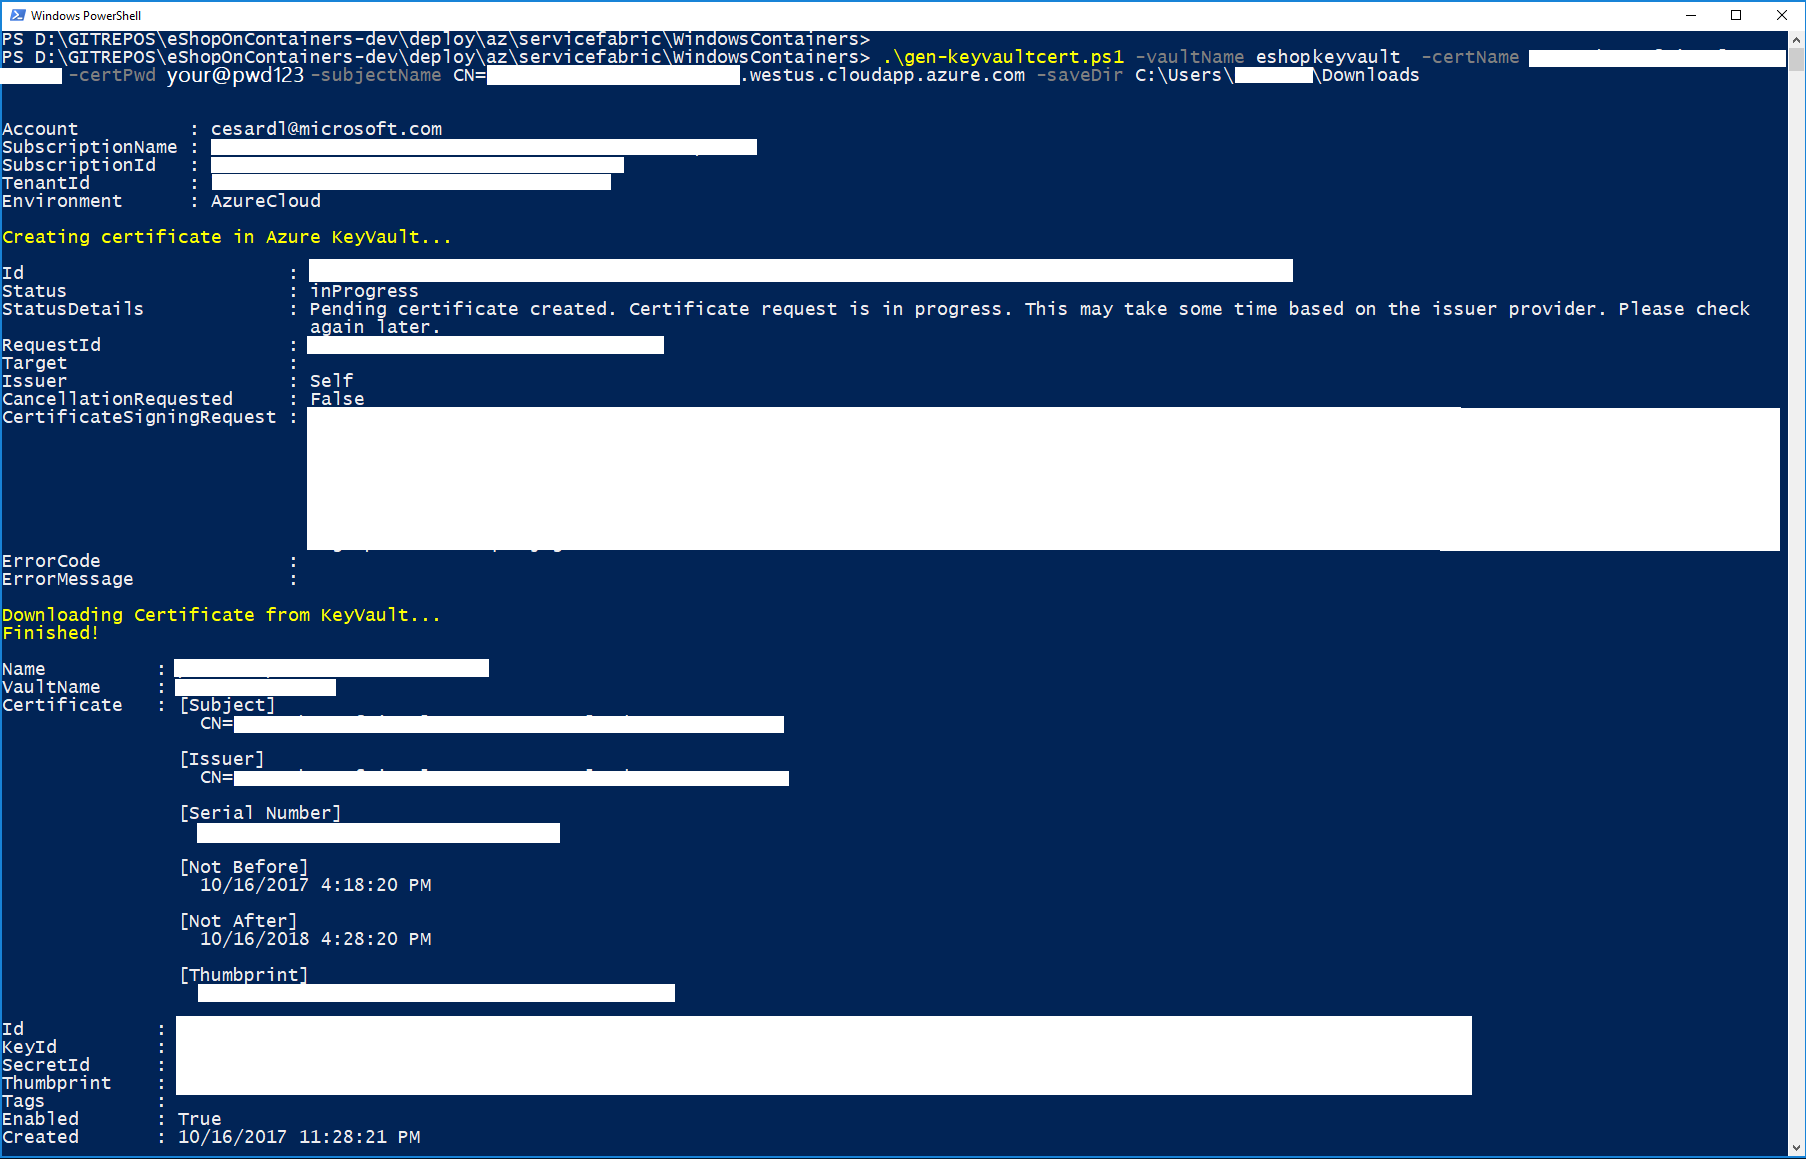
- **Execute the gen-keyvaultcert.ps1 script** to generate and download a certificate from Keyvault.
- Make sure you're going to run it against the Azure subscription you mean it.
-
- You might need to authenticate from the browser when running this PowerShell script.
-
- ```
- .\gen-keyvaultcert.ps1 -vaultName <your_keyvault_service> -certName <your_cert_name> -certPwd <your_cert_pwd> -subjectName CN=<your_sf_dns_name>.westus.cloudapp.azure.com -saveDir C:\Users\<your-user>\Downloads
-
- ```
- You should see a similar execution to the following:
- 
-
- IMPORTANT: At this point, copy/cut the .PFX certificate file saved in the downloads forlder and save it in a secure place.
-
- ## Install the certificate
- Install the certificate (by double-clicking on the .PFX file) under 'Current User' store location (by default location) and check it as exportable.
-
- <img src="../../../../img/sf/install-cert.PNG">
-
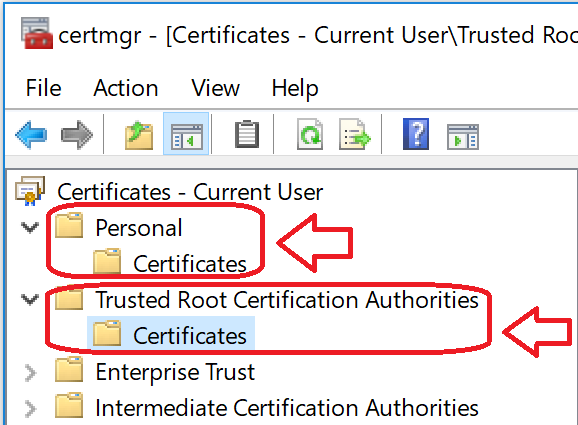
- Also, install the same certificate as CA (Certificate Authority) under Current User, too.
-
- 
-
- ## Editing servicefabricdeploysecured.parameters.json file
-
- Edit the parameters in `servicefabricdeploysecured.parameters.json` in a similar way you can do with the unsecured .json file shown above (clusterName, dnsName, etc.), plus edit the following values:
-
- - sourceVaultValue: Your Azure Keyvault's RESOURCE ID (check Azure keyvault properties, similar to: /subscriptions/e1234ac1-c09c-3jaf-6767-98b3c5f1f246/resourceGroups/eshop-global-resgrp/providers/Microsoft.KeyVault/vaults/eshopkeyvault")
-
- - certificateUrlValue: Your certificate Secret Identifier (check Azure Keyvault secret certificate properties, should be in the format of https://<name of the vault>.vault.azure.net:443/secrets/<exact location>, similar to:
- https://eshopkeyvault.vault.azure.net/secrets/pro-eshop-sfwin-cluster-cert/w647684642cGE2sj83b3hfe4h8e08963)
-
- - certificateThumbprint: certificate thumbprint (check azure Keyvault certificate thumbprint, something like 88JK453486D55A6818573G0DW9100365HDK70HDK)
-
- ## Deploy the secured SF cluster (Windows nodes)
-
- Once parameters file is edited you can deploy it using [create-resources script](../readme.md).
-
- Use a command prompt window positioned into the deploy\az folder.
-
- ```
- create-resources.cmd servicefabric\WindowsContainers\servicefabricdeploysecured pro-eshop-sfwin-resgrp -c westus
- ```
- The execution should be something like the following:
-
- 
-
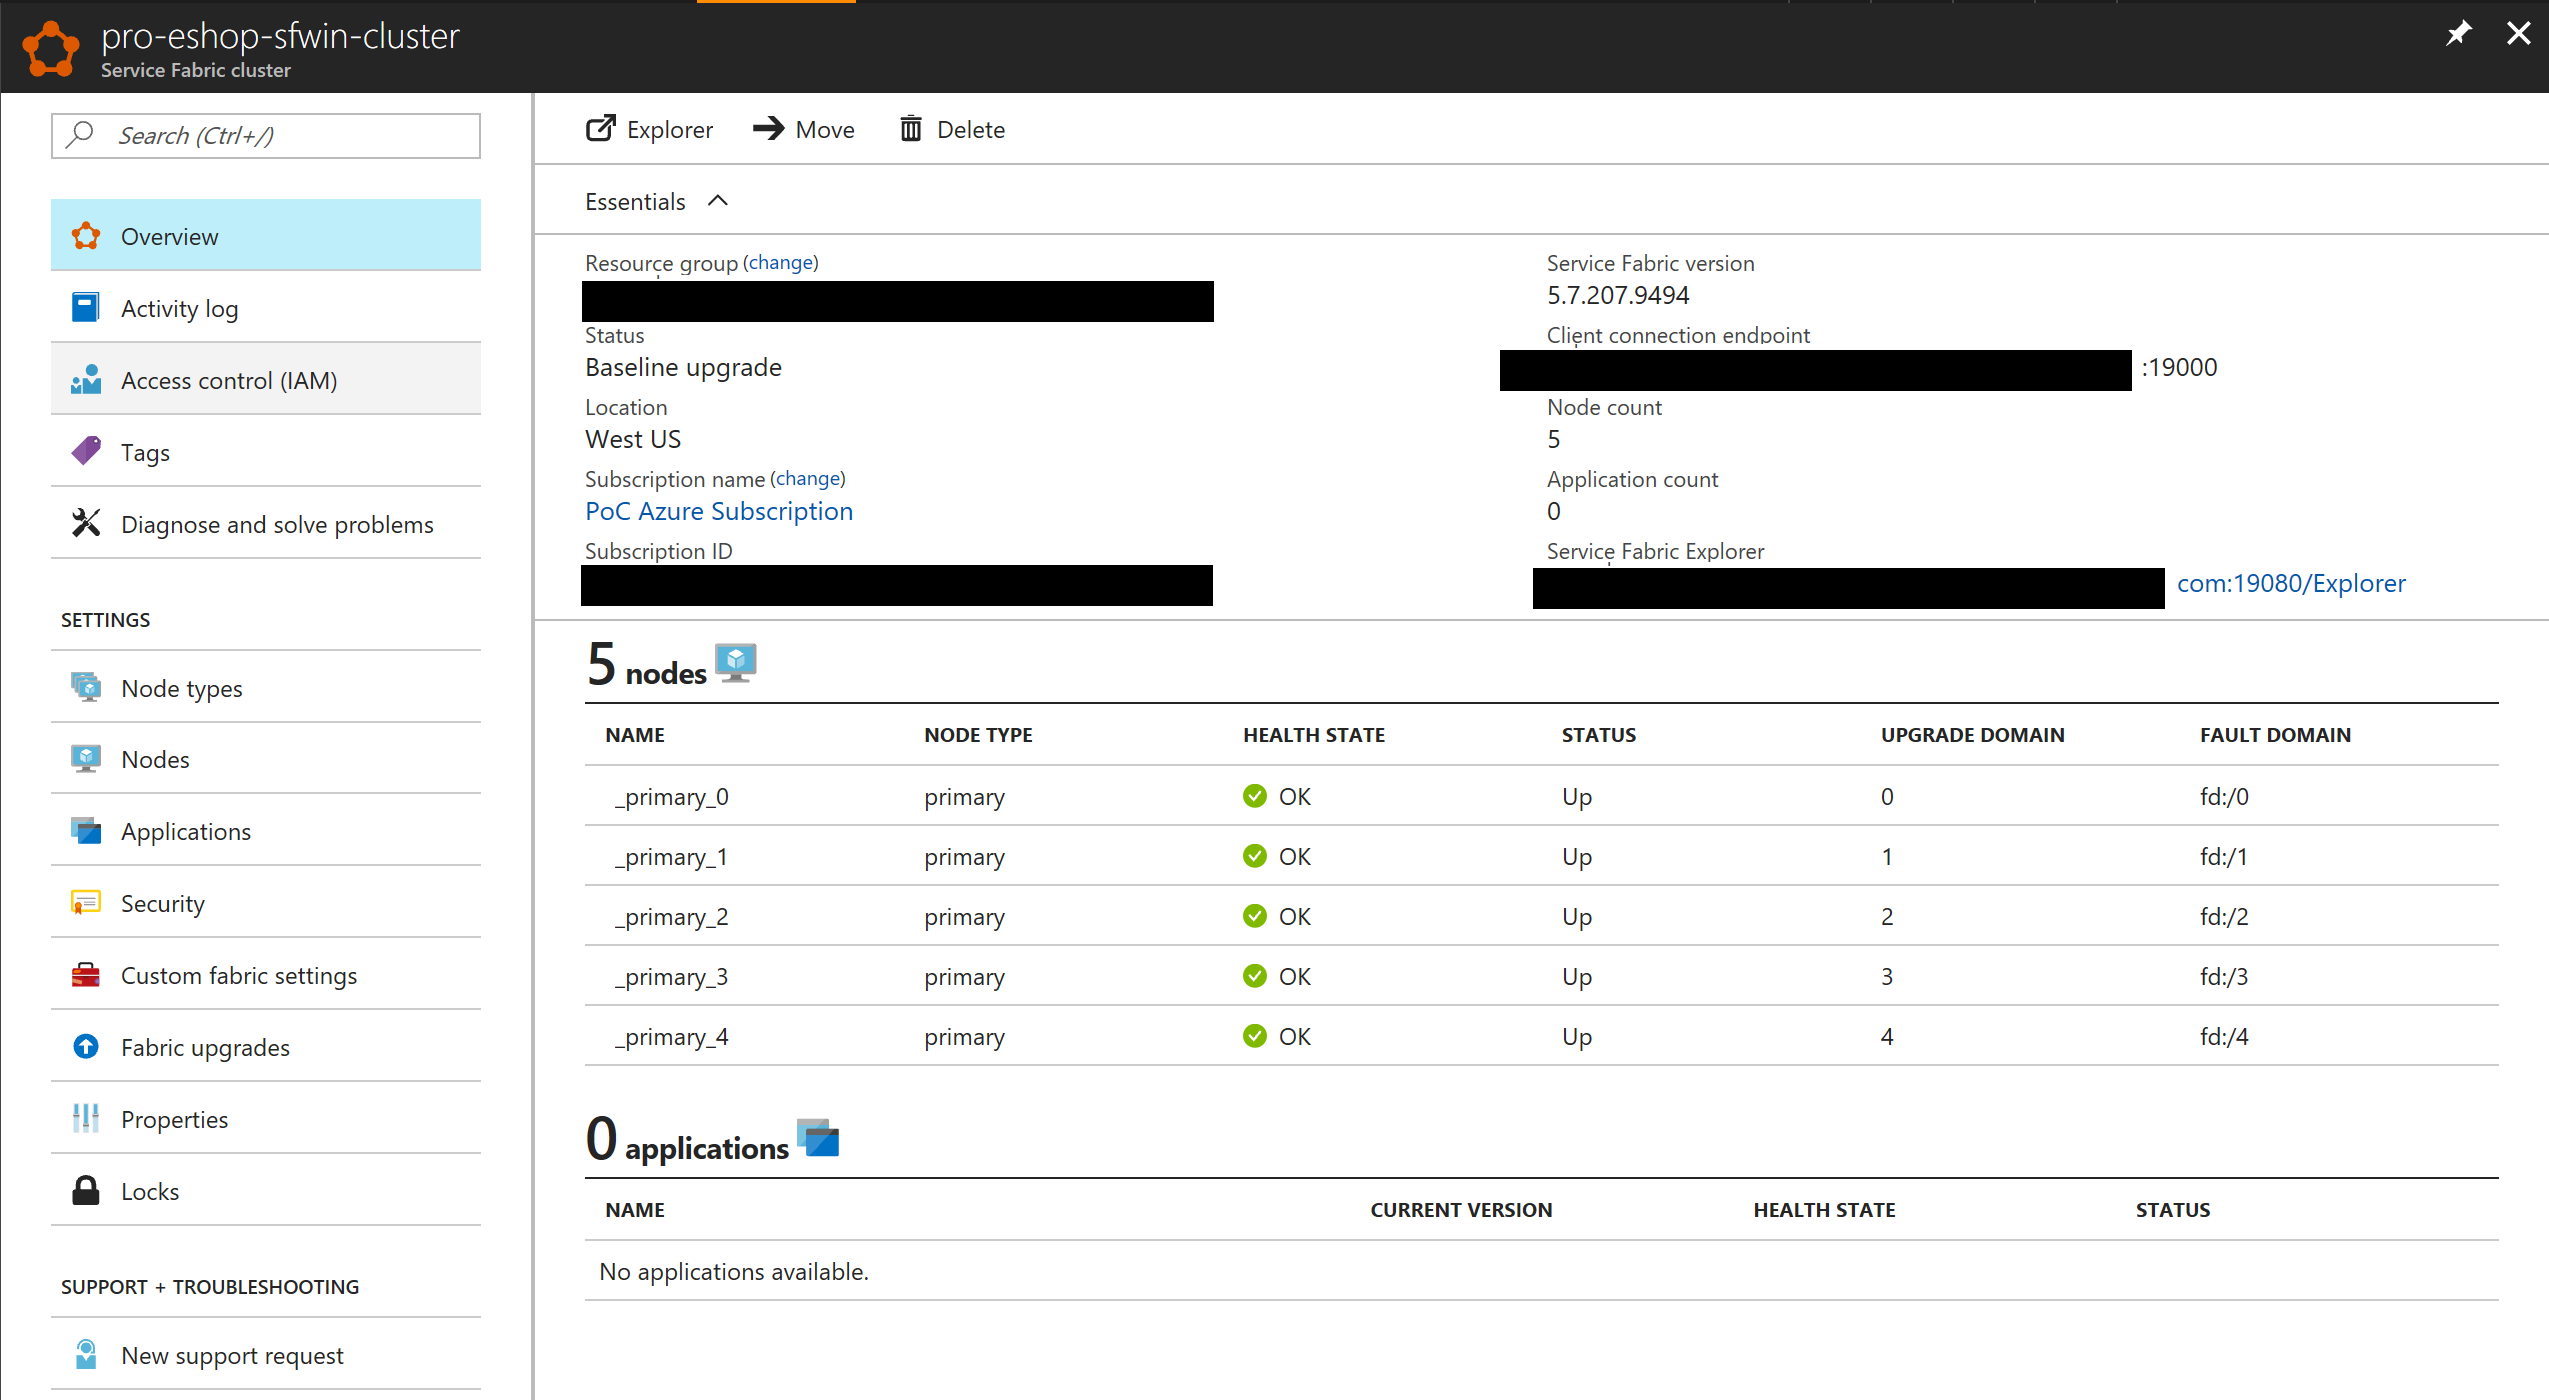
- Once the cluster is created you can explore it with Azure's portal, like in the following image:
- 
-
- In this case, the ARM template is creating a 5 node cluster when creating a SECURE cluster for "production".
-
-
- # Deploy eShopOnServiceFabric with Visual Studio.
-
- Modify the cloud.xml file of each Service Fabric application in PublishProfile directory and set your certificate settings to be able to deploy eshopOnContainers in the secured cluster:
-
- <img src="../../../../img/sf/cloud_publishProfile.PNG">
-
-
-
|
